Debugging VexRiscv Over a JTAG Tunnel with OpenOCD
Wouldn’t it be nice if the same JTAG cable used to configure a FPGA could also debug a RISC-V core implemented in the fabric? Turns out, it’s possible! For a new project using a VexRiscv core to control a few things, I wanted to try tunneled JTAG access. Also, I may have forgotten to add a separate JTAG header on my board design… Anyway, I’ll share how to configure VexRiscv and OpenOCD to use one cable for both.
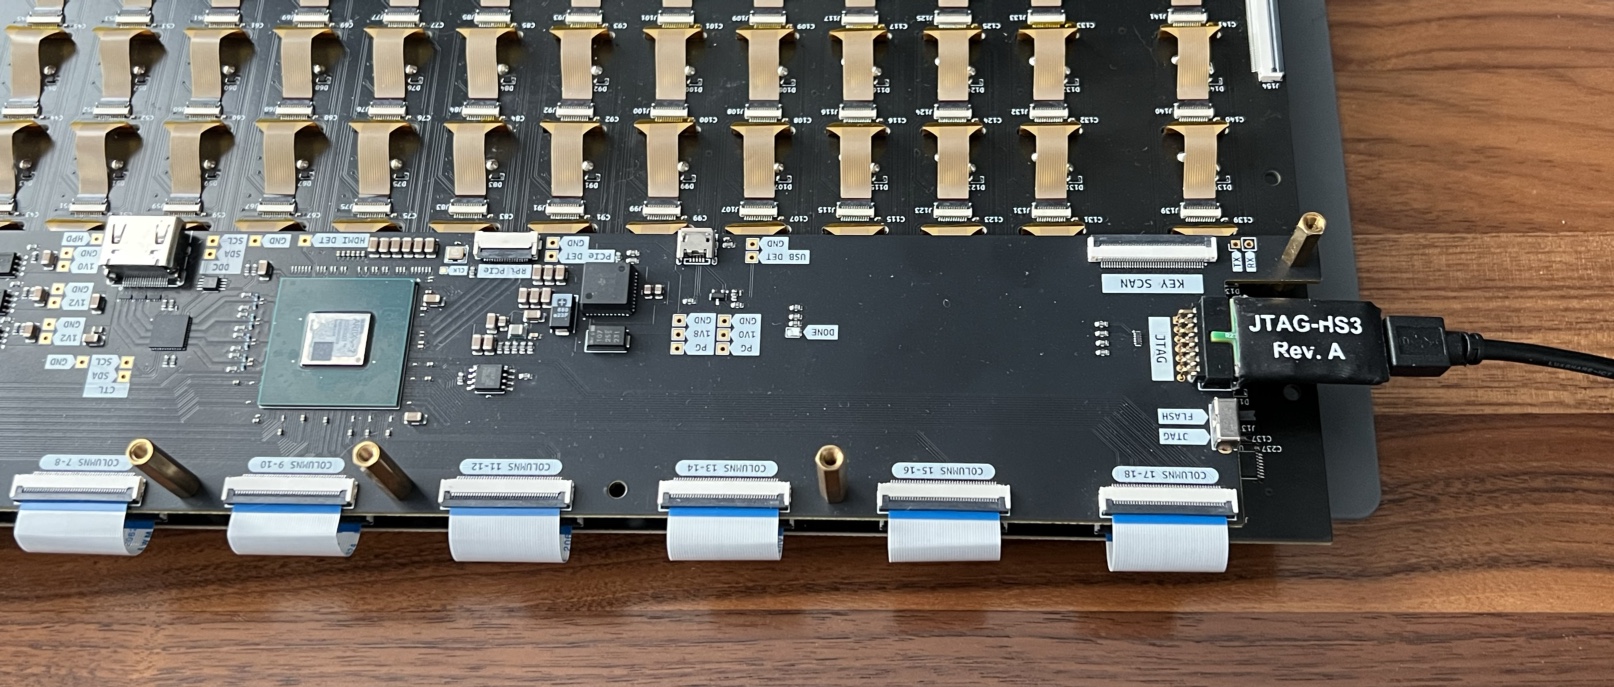
 A new project with a Xilinx XC7A200T and attached Digilent HS3 JTAG adapter
What is a JTAG tunnel
Let’s start with a typical setup where a JTAG adapter is connected to a JTAG test access port (TAP). This is how you typically debug or program a microcontroller. In this configuration, accessing the CPU’s debug module takes two steps:
- An address is written to the JTAG instruction register to select which data register to access
- Bits are written and read from the selected data register
A debug module mapped onto these registers responds appropriately, implementing what’s called JTAG transport (e.g. the SpinalHDL library’s DebugTransportModuleJtagTap used in VexRiscv).

Now when we look at JTAG adapter connected to an FPGA, the TAP has a very similar structure. Though, instead of a debug module, the FPGA has a configuration module and likely other kinds of test logic. For user logic to interact with the dedicated JTAG pins, many FPGAs offer special design primitives that can be incorporated in user logic. For example, the AMD (Xilinx) 7-Series parts have the BSCANE2 primitive (available in SpinalHDL’s library). This primitive allows implementing a custom data register for a predefined address that can be accessed from the FPGA’s JTAG TAP. However, the register addresses implemented by these primitives don’t match the addresses expected by a RISC-V debugger.
To fix that, we use a little indirection and create our own JTAG address space by using the custom data register as a nested instruction register. This nested instruction register selects its own set of data registers, “tunneling” through the predefined address. Accessing the CPU’s debug module now takes three steps:
- The address of the FPGA JTAG primitive is written to the TAP’s instruction register
- The address of a tunneled register is written to the data register, which is the tunnel’s nested instruction register
- Bits are written and read from the selected tunneled data register

Of course, using a JTAG tunnel requires software support on the host. Luckily, OpenOCD already implements options for tunneling RISC-V debug. Apparently SiFive originally created the simple tunnel protocol, and now many others use it. I left out explaining some extra bits in the tunneled instruction register that you can read about in the OpenOCD docs (search for riscv use_bscan_tunnel). By default, the tunnel uses the address for a Xilinx BSCANE2 with JTAG_CHAIN=4 (also called userid=4 or USER4 in some docs), but the address can be changed with riscv set_ir.
VexRiscv with a JTAG Tunnel
It’s quite easy to use the VexRiscv EmbeddedRiscvJtag plugin with a JTAG tunnel – just make sure to use a version from after this commit (e.g. master branch).
First, we instantiate the BSCANE2 primitive and create a JTAG clock domain based on TCK:
// must be userId = 4 for default OpenOCD setting
val xilJtag = BSCANE2(userId = 4)
val jtagClockDomain = ClockDomain(
  clock = xilJtag.TCK
)
Then, in the list of VexRiscv plugins, we configure EmbeddedRiscvJtag to use tunneling without a TAP. In this case, we don’t create a TAP since we’re riding on the FPGA’s TAP.
// in plugins list
new EmbeddedRiscvJtag(
  p = DebugTransportModuleParameter(
    addressWidth = 7,
    version      = 1,
    idle         = 7
  ),
  withTunneling = true, // uses JTAG tunnel
  withTap = false, // skips creating a TAP
  debugCd = debugClockDomain,
  jtagCd = jtagClockDomain
)
Note: Use a separate reset for the debug clock domain. I spent a long time trying to figure out why OpenOCD would connect, recognize my debug module, and then lose it. Turns out that happens when your debug module is on the same reset line as the CPU.
Finally, we connect the debug module to the BSCANE2 primitive and hook up the CPU reset:
for (plugin <- cpuConfig.plugins) plugin match {
  case plugin: EmbeddedRiscvJtag => {
    plugin.jtagInstruction <> xilJtag.toJtagTapInstructionCtrl()
    cpuReset := plugin.ndmreset
  }
  case _ =>
}
Connecting with OpenOCD
OpenOCD has merged in support for tunneling JTAG to RISC-V targets. However, make sure your copy of OpenOCD is recent – many package managers have ancient versions.
Here’s an example OpenOCD script for my Digilent HS3 adapter:
# Your adapter may be different
source [find interface/ftdi/digilent_jtag_hs3.cfg]

transport select jtag
# Higher speeds probably work, though BSCANE2 seems to influence somehow
# Without a tunnel, 30 MHz worked for configuring the FPGA
# However, 30 MHz did not work for tunneled JTAG
adapter speed 500

source [find cpld/xilinx-xc7.cfg]
set TAP_NAME xc7.tap

set _TARGETNAME cpu
target create $_TARGETNAME.0 riscv -chain-position $TAP_NAME

# param 1: width of tunnel instruction register (6 bits)
# param 2: 1 = tunneled data register mode
#          0 = nested TAP mode (I haven't seen this used)
riscv use_bscan_tunnel 6 1

init
halt
Once connected and telnet’ed in to OpenOCD telet localhost 4444, all the usual commands work. For example, I used load_image to download new firmware iterations. It’s sooo much faster than building a new FPGA bistream!
